Showing posts with label baseball. Show all posts

Thursday, December 5, 2013

Baseball Snowman Ornament


Isn't this just the cutest ornament 
for your little baseball player ?!
Quick and easy - only 4 steps....


1. Find an old baseball or softball (a new one will work too, I just like the look of a worn ball)

2. Hot glue a piece of twine to hang your ornament.....drill a hole in the ball (first locate the place on the ball that you want to make your face, then move up from there to mark the place for your twine hanger). Tie a piece of twine in a small knot.  Put a dab of hot glue in the hole, then insert the knotted end in the hole. 

3.With permanent markers draw on the snowman's eyes, nose and mouth.  I start with the nose. This gives me a better idea of how to place the eyes and mouth. I always think eyes look better close together just above the nose.

4. Find an old piece of greenery and a red berry or two and hot glue them onto the snowman's head like a little halo wreath.


For a personal touch - write your player's name on the bottom or back of the snowman ball then add the year for each year they play ball.


Thursday, October 11, 2012

Softball Wall Flower

Last year I found this little project in an issue of Flea Market Style magazine.  I have held onto the magazine waiting for the perfect opportunity to make one.  I liked it so much I wanted to share the project, so my friend Janelle and I decided to offer it as one of our classes at Sugar Creek Homestead.
Pin It


Supplies needed:
3 used softballs or baseballs (each flower requires 1 1/2 balls)
decorative button or object for the center
hemp or heavy thread
hot glue

Tools needed:
pointy scissors
nail or sharp object to pierce holes 
heavy duty sewing needle


Step 1.  Clip the thread on the balls. Pull skin off the center. Remove threads.

Step 2:  Layer 3 skins, centering them to make the petals equal distances. Punch  2-4 holes (depends on how many holes you have in your button)  in the center of the skins.  Be sure to punch through all the layers.


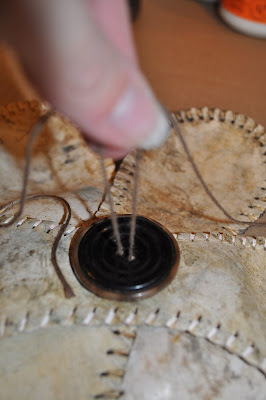
Step 3: Sew skins together with heavy thread.
I started going down through the top, being sure not to pull the thread all the way through,
 then back up through to the front.


It should look like this. Leave the thread long enough to lace through the buttons.


Step 4: Attach button and tie the thread in a square knot.  Trim the thread.


Step 5: Finishing touches. You can hot glue your flower onto any type of board. I used rusty, twisted baling wire to represent the leaves and stem of the flower.  To attach the wire, I drilled holes into the wood, just deep enough to set the wire in, then used hot glue to help hold the wire in place. The magazine also suggests framing the flower, attaching it to a hat or tote bag, or adding a wire stem and place it in a vase.


Here are some pictures from our class.


For the class, the ladies put their softball flowers on old door panels we picked up at the flea market. The paint on the panels was perfectly old and chippy. 
Such a beautiful display of flowers!