Tuesday, May 13, 2014

Easy and Inexpensive DIY Subway Art

I love subway art but think it is crazy expensive, so I did some Pinterest searching.  After reviewing a variety of DIYs I decided to venture out and make my own.


Step one:  Take a photo of something that is the color you wish your background to be. I wanted a black background so I took a picture of my son's black curtains. This is what it looked like (next picture).  Not the prettiest picture, but was just what I needed.  I even liked how the texture of the fabric gives a denim look to the background.


Step two:  Upload your photo to PicMonkey.  Go thorough the Edit option and then begin adding Text blocks to your photo, typing your text in different sizes and fonts. This took a while of fiddling around and changing fonts and sizes until I got the look I wanted. Be sure to leave enough room at the top and bottom of your "photo" so it will fit on the photo poster you are going to make. Once you have your text done, save your project to your computer.


Step three:  Upload your subway art "photo" to the photo developer of choice.  I chose Walgreens because with their coupon I could get a 16x20 poster for $10.  By ordering your subway art as a poster you save a ton of money!  I was able to pick up my poster the next day.

Step four: Get a framed canvas from your local craft store and prepare the edges in a color that matches your background.  For me that was black. Let it dry completely.


Step five: Next you will Mod Podge your poster to the canvas.  When you Mod Podge the poster be sure to paint the Mod Podge on the top of the canvas and the back of your poster, completely covering the surface area of both.   Press the poster on the canvas, making sure it is straight and the edges line up. Now paint Mod Podge on top of the photo poster.


I painted four coats of Mod Podge on top, letting it dry completely between coats


Love the way this turned out.  We made it for my kids high school choir director who is an amazing woman and blessing to so many.


Thursday, March 20, 2014

80th Birthday Gift Idea

I will admit it is very difficult to come up with a gift for someone turning 80!  They most likely have everything they want or need.  Such is the case with my father in law.  So after searching Pinterest for a while, I took a couple ideas and combined them in to the perfect gift.

80 index cards with 80 special memories that he (my father-in-law)  helped make throughout his lifetime.

My husband has 3 siblings so each family was give the task of completing 20 index cards. One card for each memory they wanted to share.  That was only 20 cards per family.  
If we had to do it again, I probably would have asked extended family and friends for memories, but this worked out fine.  It was not difficult to come up with the memories. 

I painted this box to put them in, something as a special keepsake.


 I collected all the index cards and tied them with a piece of yarn and put them in the box.


During his Birthday Celebration we present him with the box.


We had him read several of the index cards out loud, which of course sparked chatter and laughter from all of us.  It was a great way to make my father-in-law feel special and thank him for all the great memories he has made for the family.


Wednesday, March 5, 2014

GoldFish Races

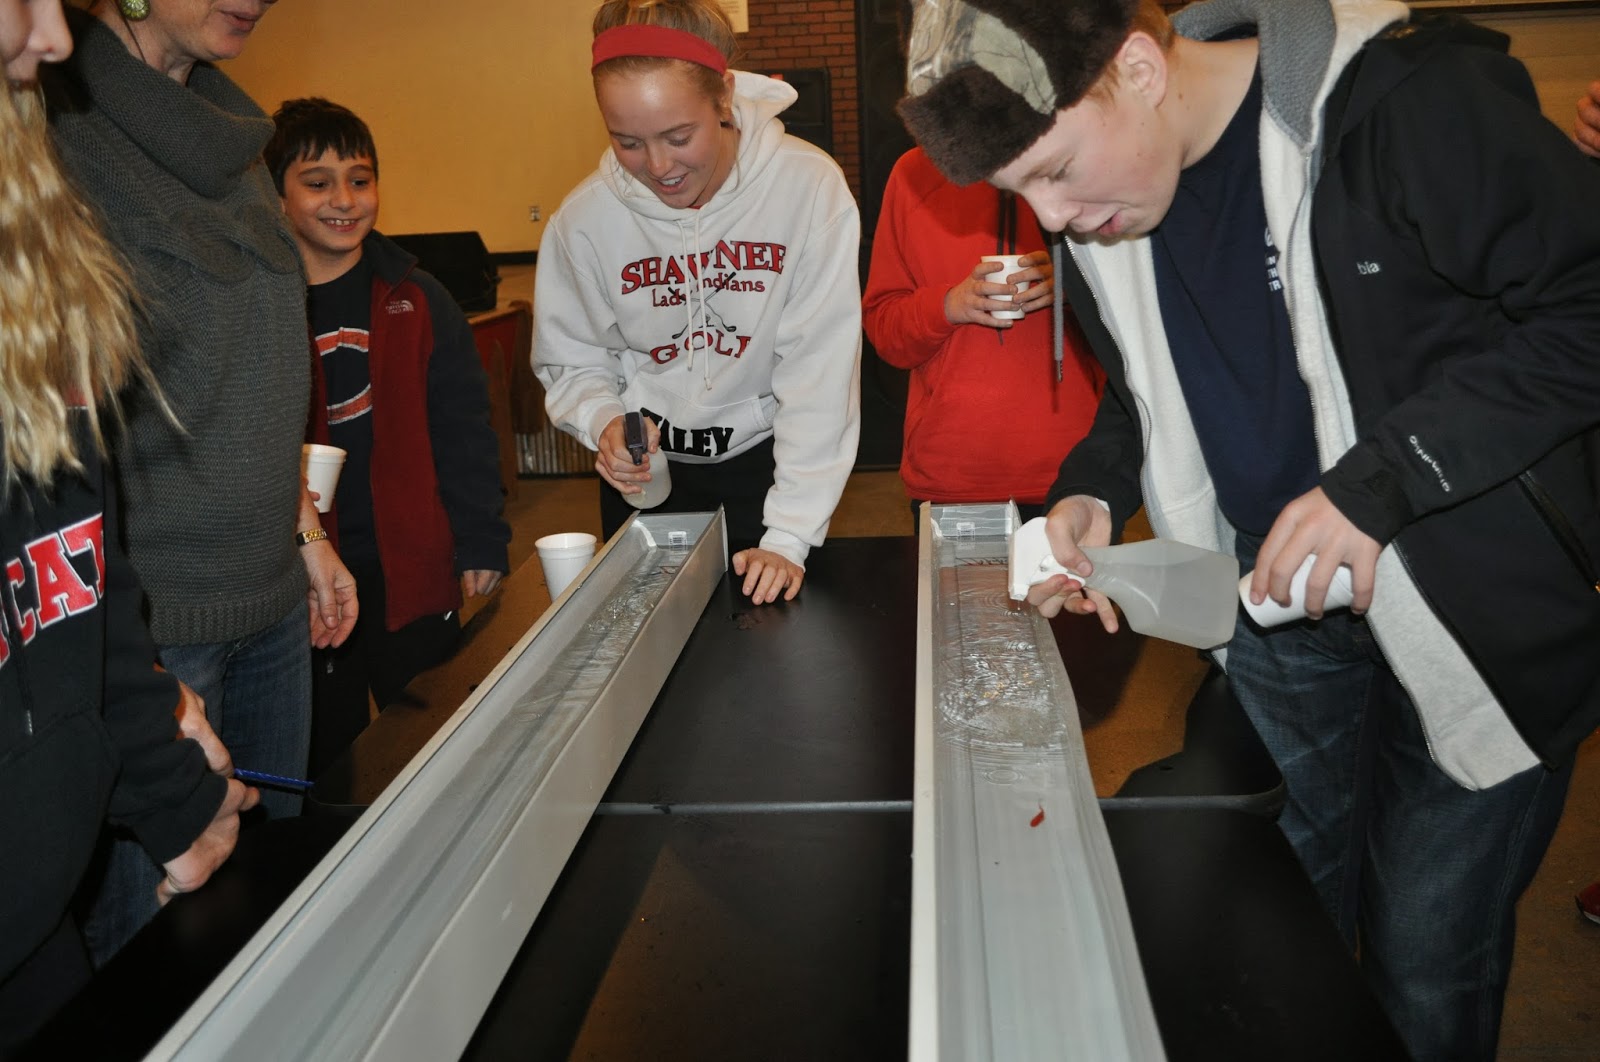
GoLdFiSh RaCeS  - Fun, FUn, FUN!!! 
This is a great activity to do at a club meeting, birthday party, carnival or family reunion.
Not a lot of prep work or explaining to be done.

Supplies
2 gutters
goldfish
cups
water
squirt bottles
bracket chart

Basically you need 2 gutters with end caps sealed so they will hold water.  The gutters we used were about 5 feet in length.  On the inside bottom mark the start and finish lines with permanent marker.
Go get the cheap, feeder goldfish from WalMart (about 28 cents each).  Have at least one for each participant.  I recommend buying extra, as we had some that didn't make it from WalMart to our meeting.  
Place the gutters on a table side by side and fill about 1/2 full with water.


Assign each participant a place on a bracket chart.
Have each person pick a goldfish from the tank.  They can hold their goldfish in a plastic cup until it is time for their race. Some may even want to write the name of their goldfish on the cup.


On Your Mark, Get Set, Go!!!!  
Participants dump their goldfish into the gutter at the starting line.  With the squirt bottles they spray water just behind the goldfish.  The goldfish will start swimming toward the finish line.


If you are unable to get goldfish you can use ping pong balls, but it isn't quite as fun!


Lots of FUN for everyone!


Friday, January 24, 2014

Fresh Fruit Salsa Dip

I've been meaning to get this recipe up while pomegranates are still in season.  This is a favorite around our house.  Perfect fresh fruit dip for family gatherings or a healthy snack after school.

Begin with a variety of fresh fruit.  Apples, pears, kiwi, pomegranates, strawberries, blackberries, etc. I tend to use whatever is in season.  I like to make sure to have apples or pears to add a solid texture to the salsa. Strawberries are a must as well.  Then I fill in with other fruits.


There is no right or wrong amount of fruit to use, but here is a basic recipe I follow:
2 - 3 apples
1 pound strawberries
1 pomegranate
3 kiwi
1 small package blackberries
Clean and prep fruit.
Chop all the fruit and mix together in a large bowl.
(obviously if you are using pomegranates you don't want to chop them)


Mix in:
2 Tablespoons brown sugar
1 Tablespoon white sugar
1-2 Tablespoons jam (any flavor)


Gently blend together.  Refrigerate until ready to serve.


 We serve this fresh fruit salsa with cinnamon chips or cinnamon graham crackers. Cinnamon tortilla chips used to be available most places, but now a days I can only find Cinnamon Popcorn Chips by Popcorn Indiana at Walmart.  If you are really ambitious you can make your own using soft tortillas..  Cinnamon pita chips are also an option, but we have found that pita chips are almost too thick and crunchy for this dip, but I suppose it is a matter of preference.  And per my son's advice - just eat it by the spoonful, no chips needed!


Thursday, December 5, 2013

Baseball Snowman Ornament


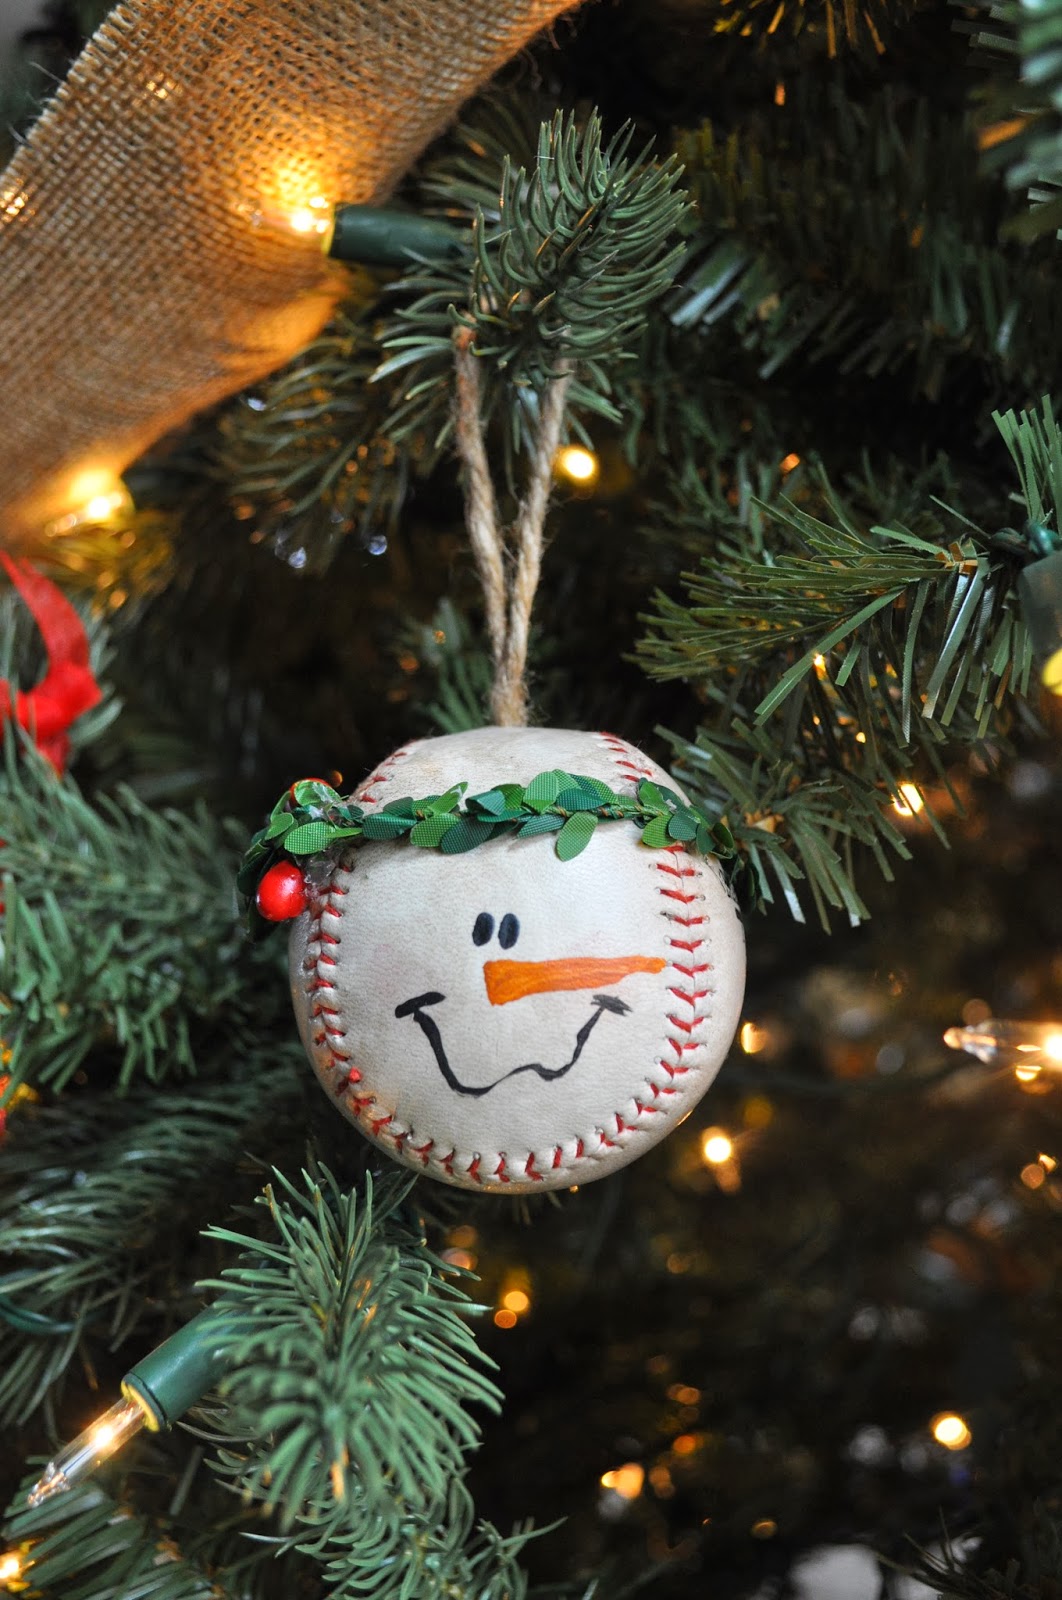
Isn't this just the cutest ornament 
for your little baseball player ?!
Quick and easy - only 4 steps....


1. Find an old baseball or softball (a new one will work too, I just like the look of a worn ball)

2. Hot glue a piece of twine to hang your ornament.....drill a hole in the ball (first locate the place on the ball that you want to make your face, then move up from there to mark the place for your twine hanger). Tie a piece of twine in a small knot.  Put a dab of hot glue in the hole, then insert the knotted end in the hole. 

3.With permanent markers draw on the snowman's eyes, nose and mouth.  I start with the nose. This gives me a better idea of how to place the eyes and mouth. I always think eyes look better close together just above the nose.

4. Find an old piece of greenery and a red berry or two and hot glue them onto the snowman's head like a little halo wreath.


For a personal touch - write your player's name on the bottom or back of the snowman ball then add the year for each year they play ball.


Tuesday, November 26, 2013

"Popping" Popcorn Christmas Ornament

How did the popcorn get in the glass ornament???

 
It's fun and easy!  
Do this as an activity with children 
or package it up and give it as a gift.

Supplies:
Clear glass Christmas ornaments
Popcorn
Ribbon (optional)


Remove the shiny top from the glass ornament.
Add popcorn kernels to the glass bulb.  I placed about 40 kernels in the large glass bulb and 20 in the smaller bulbs.  Not all the kernels will pop, so don't be afraid to add a few extra.


Place glass bulb with the opening up in a microwave safe bowl.  Use a bowl that will hold the bulb so the opening stays pretty much upright.


Microwave bulb with popcorn kernels on high  for 1 minute and 10 seconds

 Careful - glass will be hot.  Shake out any un-popped kernels


Put top back on the glass ornament and tie with a ribbon.  Hang on Christmas tree.


This also makes a fun gift packaged with instructions.


Popcorn Ornament
Remove the shiny top
Place me in the microwave
Until you hear me pop!


Instruction:
Remove the shiny top.
Secure glass bulb upright in a small microwavable bowl.
Heat on high in the microwave for 1 minute and 10 seconds.
Glass will be hot - carefully shake out un-popped kernels.
Put top back on glass bulb and tie with a ribbon.
Hang on tree.

Tuesday, November 5, 2013

Yummy Pumpkin Roll

Have you ever had an Amish made pumpkin roll?  If you have, I am sure you will admit, they are amazing! Well the recipe I am about to share comes pretty darn close.  And it is not too difficult to make.  Rolling it up may be a little intimidating to some, but a little plastic wrap and the freezer takes care of all those imperfections - trust me!


Pumpkin Roll 
3/4 cup flour
2/3 cup pumpkin
3 eggs
1 tsp baking soda
1/2 tsp cinnamon
1 cup sugar
Mix well.  Line jelly roll pan with greased wax paper. 
Pour batter in prepared pan.  Bake 375 for 10 minutes
Filling
1 cup powdered sugar
8 oz cream cheese (room temperature) 
2 TBSP butter or margarine (melted)
1/2 tsp vanilla
Cream together


 Line jelly roll pan with greased wax paper

  Pour batter in prepared jelly roll pan

 Spread a towel out on your counter.  
Use a tightly woven cotton towel, not terrycloth. 
Sprinkle 1/4 cup sugar on the towel.

 Bake on 375 for 10-12 minutes or until done.


After you remove the cake from the oven, 
flip it upside down on the sugared towel.

  Gently remove the wax paper

While the cake is still kinda warm, 
spread the cream filling over the entire surface.

 Now the tricky part - don't be afraid.....using the palm of both hands gently roll the cake up.  (I could only demonstrate with one hand since I needed the other to take the picture. This will get a little messy and the cake will crack. )

 See the cracks?  They won't be noticeable when you serve it, trust me. 
On the counter immediately next to your towel, spread a large piece of plastic wrap.  Now gently pick up the entire roll, be sure to have a good hold on both ends, extending your fingers across as much of the surface of the roll as possible, and place the roll on the plastic wrap.

Sometimes I cut the roll in half (as shown below), and freeze it as 2 smaller rolls, depending on what I have planned for it. When you wrap the plastic around your pumpkin roll, pull it tight.  This will help pull those cracks together. Then wrap the pumpkin roll again on aluminum foil. Place in freezer until ready to serve.


 Cut and serve while it is still cold.

 Yummy!