Pages

Thursday, October 30, 2014

DIY Rustic Photo Booth

I had such a great time putting together this fun PHOTO BOOTH for a couple events we had in our barn this fall. With everyone having camera's on their phones, it is fun to provide a place for friends to be goofy and pose for a photo.

I started with a couple old doors that I used to use as back drops for craft show displays.  They were already hinged together, but we used a little wire around the door knobs to give them extra strength. 


Then I gathered some props to add interest to the back drop. Since we were doing the photo booth for fall events I went with a Halloween theme.  But this could be done for a spring event with baskets of flowers and burlap or a winter event with a Christmas tree and presents as props.

I perched a crow on top of one door.


Hung an empty vintage frame  on another door


Hung a chandelier with twine from the rafters.


Then I stretched cobwebs all over the photo booth and made a sign to hang on a door knob.


A large black wooden frame and an extra large old window frame were provided for people to pose behind if they wished.  But pictures looked good without the frames too!


I filled a clothes basket with hats, wigs, masks, glasses, mustaches, and a few other silly items.


It was fun seeing people laugh and giggle as they took pictures in this make shift Photo Booth


Lots of fun memories!


Wednesday, July 2, 2014

Hollyhock Dolls


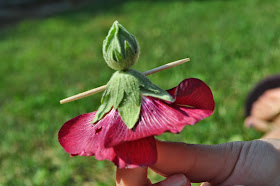
When my girls were little my mother-in-law taught them how to make Hollyhock Dolls. These simple, dainty dolls require only a few supplies and will bring a smile to anyone who sees them.
Hours of summer fun!


Supplies: A hollyhock flower, a hollyhock bud and 2 toothpicks.
I'm not going to write out the directions because the pictures explain it quite simply. Just follow along below.


 Your little girls and their friends will have hours of fun making these charming little dolls on a sunny summer afternoon.


Aren't they adorable!


Wednesday, June 18, 2014

Mashed Potatoes for a 100

My daughter LOVES mashed potatoes.  Always has and always will.  When she was younger we would have to cut her off at Thanksgiving and Christmas.  Rest assured grandma always sent her home with plenty of left over mashed potatoes.

So for her high school graduation party we thought it would be fun to have a Mashed Potato Bar.
I began searching the internet on how to make mashed potatoes in a roaster oven or at least how to make mashed potatoes for 100 plus guests.  I didn't find directions that satisfied my need., but I did find several sites with directions for making mashed potatoes in a crock pot.  

Crock pot - roaster oven? The biggest difference is size, right?

Thus I began calculating what I would need to make mashed potatoes for a crowd - I was thinking 100-150 people..

Larger electric roaster oven
35 pounds of potatoes
6 cups of water
3 cups of butter
6 tsp slat
3 tsp pepper
8-10 cups of milk


To begin with I sprayed the inside of the roaster oven with PAM. Then I washed, peeled (I left some of the peels on), and cubed the potatoes, placing them in the roaster as I went.


I added 6 cups of water, 3 cups of butter cut in chunks,  6 tsp salt and 3 tsp pepper.  Turned the roaster on high (375-400 degrees) and  let them cook for 4 hours.  Sure enough they were soft.  

Now for the fun!  Dealing with that many potatoes at once can be quite the hot mess.  I di not drain the potatoes. I began by mashing them by hand with my antique potato masher.  Once the potatoes were semi mashed I used my electric beater, scooping potatoes up from the bottom and stirring as I beat.  I also began to slowly add the milk.  Add enough of the milk to make the mashed potatoes my desired consistency. 


I kept the mashed potatoes on warm until we were ready to serve.  

Note: I will mention that when you make mashed potatoes in a crock pot or roaster oven they will tend to be a little darker colored than the bright white mashed potatoes mom makes on Thanksgiving, but they taste just as good!

The mashed potato bar turned out fantastic.  Unfortunately, I was so wrapped up in visiting with everyone and celebrating my daughter's graduation, I forgot to take pictures.

If you can imagine bowls of mashed potatoes with these toppings:

shredded cheddar
real bacon bits
popcorn chicken
gravy
sweet corn
bbq pulled pork
jalapenos
butter
sour cream
chives


Not sure how many people we had at the party, but I always worry about not having enough food.  Although the roaster looked like a ton of mashed potatoes, I made an extra 5 pound batch in my crock pot just in case I ran out.  I didn't run out, but  I did have to get the crock pot of potatoes and add them to the roaster towards the end of the party.  So we went through almost 40 pounds of potatoes!
Can you say YUM!!!


Tuesday, May 13, 2014

Easy and Inexpensive DIY Subway Art

I love subway art but think it is crazy expensive, so I did some Pinterest searching.  After reviewing a variety of DIYs I decided to venture out and make my own.


Step one:  Take a photo of something that is the color you wish your background to be. I wanted a black background so I took a picture of my son's black curtains. This is what it looked like (next picture).  Not the prettiest picture, but was just what I needed.  I even liked how the texture of the fabric gives a denim look to the background.


Step two:  Upload your photo to PicMonkey.  Go thorough the Edit option and then begin adding Text blocks to your photo, typing your text in different sizes and fonts. This took a while of fiddling around and changing fonts and sizes until I got the look I wanted. Be sure to leave enough room at the top and bottom of your "photo" so it will fit on the photo poster you are going to make. Once you have your text done, save your project to your computer.


Step three:  Upload your subway art "photo" to the photo developer of choice.  I chose Walgreens because with their coupon I could get a 16x20 poster for $10.  By ordering your subway art as a poster you save a ton of money!  I was able to pick up my poster the next day.

Step four: Get a framed canvas from your local craft store and prepare the edges in a color that matches your background.  For me that was black. Let it dry completely.


Step five: Next you will Mod Podge your poster to the canvas.  When you Mod Podge the poster be sure to paint the Mod Podge on the top of the canvas and the back of your poster, completely covering the surface area of both.   Press the poster on the canvas, making sure it is straight and the edges line up. Now paint Mod Podge on top of the photo poster.


I painted four coats of Mod Podge on top, letting it dry completely between coats


Love the way this turned out.  We made it for my kids high school choir director who is an amazing woman and blessing to so many.


Thursday, March 20, 2014

80th Birthday Gift Idea

I will admit it is very difficult to come up with a gift for someone turning 80!  They most likely have everything they want or need.  Such is the case with my father in law.  So after searching Pinterest for a while, I took a couple ideas and combined them in to the perfect gift.

80 index cards with 80 special memories that he (my father-in-law)  helped make throughout his lifetime.

My husband has 3 siblings so each family was give the task of completing 20 index cards. One card for each memory they wanted to share.  That was only 20 cards per family.  
If we had to do it again, I probably would have asked extended family and friends for memories, but this worked out fine.  It was not difficult to come up with the memories. 

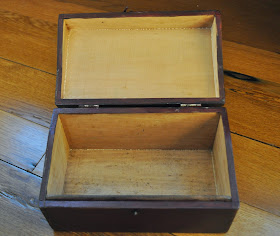
I painted this box to put them in, something as a special keepsake.


 I collected all the index cards and tied them with a piece of yarn and put them in the box.


During his Birthday Celebration we present him with the box.


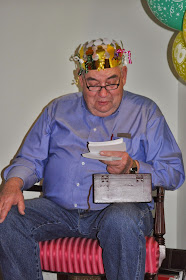
We had him read several of the index cards out loud, which of course sparked chatter and laughter from all of us.  It was a great way to make my father-in-law feel special and thank him for all the great memories he has made for the family.


Wednesday, March 5, 2014

GoldFish Races

GoLdFiSh RaCeS  - Fun, FUn, FUN!!! 
This is a great activity to do at a club meeting, birthday party, carnival or family reunion.
Not a lot of prep work or explaining to be done.

Supplies
2 gutters
goldfish
cups
water
squirt bottles
bracket chart

Basically you need 2 gutters with end caps sealed so they will hold water.  The gutters we used were about 5 feet in length.  On the inside bottom mark the start and finish lines with permanent marker.
Go get the cheap, feeder goldfish from WalMart (about 28 cents each).  Have at least one for each participant.  I recommend buying extra, as we had some that didn't make it from WalMart to our meeting.  
Place the gutters on a table side by side and fill about 1/2 full with water.


Assign each participant a place on a bracket chart.
Have each person pick a goldfish from the tank.  They can hold their goldfish in a plastic cup until it is time for their race. Some may even want to write the name of their goldfish on the cup.


On Your Mark, Get Set, Go!!!!  
Participants dump their goldfish into the gutter at the starting line.  With the squirt bottles they spray water just behind the goldfish.  The goldfish will start swimming toward the finish line.


If you are unable to get goldfish you can use ping pong balls, but it isn't quite as fun!


Lots of FUN for everyone!